
Configuration
Roadiz is a full-stack Symfony application. It follows its configuration scheme as described in Symfony Configuration.
Choose your database inheritance model
Roadiz's main feature is its polymorphic data model, mapped to a relational database. This structure can cause performance bottlenecks when dealing with more than 20-30 node types. To address this, we made the data inheritance model configurable.
Roadiz defaults to single_table mode for better performances with many node-types. However, this model does not support fields with the same name but different types since all node-type fields are stored in the same SQL table. Single table inheritance is the best option when you fetch different node-sources as the same time (for page blocks).
TIP
In single_table mode, you can optimize your performances but reusing field name across node-types whenever possible. This will keep your columns count low and your queries fast.
For mixed field types, you can switch to joined inheritance type. This model is better with a small number of node-types (max. 20) but with very different fields. It requires LEFT JOIN operations on each node-source query unless a node-type criterion is specified. Joined table inheritance is a better option when you always fetch node-sources of the same type (for example, a list of articles).
Configure Doctrine strategy in config/packages/roadiz_core.yaml:
roadiz_core:
    inheritance:
        # type: joined
type: single_table- Joined class inheritance:
joined - Single table inheritance:
single_table
WARNING
Changing this setting after content creation will erase all node-source data.
Configure a captcha service for custom forms and POST API endpoints
Roadiz supports captcha verification provided by:
Roadiz will automatically use the configured captcha service based on roadiz_core.captcha.verify_url value.
roadiz_core:
    captcha:
        private_key: '%env(string:APP_CAPTCHA_PRIVATE_KEY)%'
        public_key: '%env(string:APP_CAPTCHA_PUBLIC_KEY)%'
        verify_url: '%env(string:APP_CAPTCHA_VERIFY_URL)%'
If you change APP_CAPTCHA_VERIFY_URL environment variable, you need to clear Symfony cache to apply the new configuration.
Then you can use the withCaptcha() method on your contact-form manager to add a captcha field to your form. Or inject the RZ\Roadiz\CoreBundle\Captcha\CaptchaServiceInterface in your own logic to verify the captcha response.
You can check which captcha service is currently configured by running the following command:
bin/console debug:container CaptchaServiceInterface

# Example output:
Information for Service "RZ\Roadiz\CoreBundle\Captcha\CaptchaServiceInterface"
==============================================================================

 ---------------- ------------------------------------------------------------
  Option           Value
 ---------------- ------------------------------------------------------------
  Service ID       RZ\Roadiz\CoreBundle\Captcha\CaptchaServiceInterface
  Class            RZ\Roadiz\CoreBundle\Captcha\TurnstileCaptchaService
  Tags             -
  Public           yes
  Synthetic        no
  Lazy             no
  Shared           yes
  Abstract         no
  Autowired        no
  Autoconfigured   no
  Usages           RZ\Roadiz\CoreBundle\Form\CaptchaType
                   RZ\Roadiz\CoreBundle\Form\Constraint\CaptchaValidator
                   RZ\Roadiz\CoreBundle\Form\CustomFormsType
                   RZ\Roadiz\CoreBundle\Mailer\ContactFormManagerFactory
 ---------------- ------------------------------------------------------------
Default captcha service verification URLs
- Google reCAPTCHA:
https://www.google.com/recaptcha/api/siteverify - Friendly CAPTCHA:
https://global.frcapi.com/api/v2/captcha/siteverify - hCaptcha:
https://hcaptcha.com/siteverify - Cloudflare Turnstile:
https://challenges.cloudflare.com/turnstile/v0/siteverify
API endpoints captcha verification
Protected API endpoints can be configured to require captcha verification such as POST requests to custom-forms. If JSON form responses includes one of the following keys in required property, Roadiz will automatically verify the captcha response against the configured captcha service:
frc-captcha-responseh-captcha-responseg-recaptcha-responsecf-turnstile-response
Reverse Proxy Cache Invalidation
Roadiz supports cache invalidation for both external (e.g., Varnish) and internal (Symfony AppCache) reverse proxies. When the back office cache is cleared, Roadiz sends a BAN request. For node-source updates, a PURGE request is sent. using the first reachable node-source URL.
Varnish Configuration
roadiz_core:
    reverseProxyCache:
        frontend:
            default:
                host: '%env(string:VARNISH_HOST)%'
                domainName: '%env(string:VARNISH_DOMAIN)%'
To ensure proper cache handling, configure your external reverse proxy: Reverse Proxy Configuration.
API Platform Invalidation
For API Platform, configure http_cache:
api_platform:
    http_cache:
        invalidation:
            enabled: true
            varnish_urls: [ '%env(VARNISH_URL)%' ]
Cloudflare Proxy Cache
Roadiz can send purge requests to Cloudflare. Collect the following information:
- Cloudflare zone identifier
- Cloudflare API credentials (Bearer token or email + auth-key)
Using Bearer token:
roadiz_core:
    reverseProxyCache:
        frontend: [ ]
        cloudflare:
            zone: cloudflare-zone
            bearer: ~
Using Email and AuthKey:
roadiz_core:
    reverseProxyCache:
        frontend: [ ]
        cloudflare:
            zone: cloudflare-zone
            email: ~
            key: ~
Entities Paths
Roadiz uses Doctrine to map object entities to database tables. Example configuration:
doctrine:
    dbal:
        url: '%env(resolve:DATABASE_URL)%'
    orm:
        default_entity_manager: default
        entity_managers:
            default:
                mappings:
                    App:
                        is_bundle: false
                        type: attribute
                        dir: '%kernel.project_dir%/src/Entity'
                        prefix: 'App\Entity'
                        alias: App
INFO
Always use type: attribute as Doctrine annotations support has been dropped on Symfony 7.3+.
Configure Mailer
Roadiz uses Symfony Mailer for email handling. Symfony Mailer Setup
# config/packages/mailer.yaml
framework:
    mailer:
        dsn: '%env(MAILER_DSN)%'
        # Mailer Envelope configuration
        envelope:
sender: '%env(string:MAILER_ENVELOP_SENDER)%'# .env.local
###> symfony/mailer ###
MAILER_DSN=smtp://mailer:1025
MAILER_ENVELOP_SENDER="Roadiz Dev Website<[email protected]>"
###< symfony/mailer ###TIP
Check that your envelope sender address is from a validated domain (i.e. SPF, DKIM) to avoid being blacklisted.
Image Processing
Roadiz integrates with Intervention Request Bundle for automatic image resizing and optimization.
rz_intervention_request:
    driver: '%env(IR_DRIVER)%'
    default_quality: '%env(int:IR_DEFAULT_QUALITY)%'
    max_pixel_size: '%env(int:IR_MAX_PIXEL_SIZE)%'
    cache_path: "%kernel.project_dir%/public/assets"
    files_path: "%kernel.project_dir%/public/files"
    jpegoptim_path: /usr/bin/jpegoptim
    pngquant_path: /usr/bin/pngquant
    subscribers: [ ]
Kraken.io Integration
rz_intervention_request:
    subscribers:
        -   class: "AM\\InterventionRequest\\Listener\\KrakenListener"
            args:
                - "your-api-key"
                - "your-api-secret"
                - true
WARNING
Each generated image is sent to kraken.io, which may increase loading times.
Two-Factor Authentication
To enable Two-Factor Authentication (2FA), install the package:
composer require roadiz/two-factor-bundleConfigure in config/packages/scheb_2fa.yaml and config/packages/security.yaml.
Two-Factor Authentication Docs
OpenID SSO Authentication
Roadiz supports OpenID authentication with Google accounts. Configuration options:
roadiz_rozier:
    open_id:
        verify_user_info: false
        discovery_url: '%env(string:OPEN_ID_DISCOVERY_URL)%'
        hosted_domain: '%env(string:OPEN_ID_HOSTED_DOMAIN)%'
        oauth_client_id: '%env(string:OPEN_ID_CLIENT_ID)%'
        oauth_client_secret: '%env(string:OPEN_ID_CLIENT_SECRET)%'
        requires_local_user: false
        granted_roles:
            - ROLE_USER
            - ROLE_BACKEND_USER
Authentik SSO
Declare Variables in Your .env
Set the following environment variables in your .env.local file:
PG_PASS(Auth0 recommends generating this with OpenSSL)AUTHENTIK_SECRET_KEY(Auth0 recommends generating this with OpenSSL)PG_USER(PostgreSQL user)PG_DB(PostgreSQL database)
Running Authentik
Start your authentik application with :
docker compose -f compose.authentik.yml --env-file .env.local up -d --force-recreateAnd navigate to:
http://<your-server-IP-or-hostname>:9000/if/flow/initial-setup/to create your admin user in Authentik.
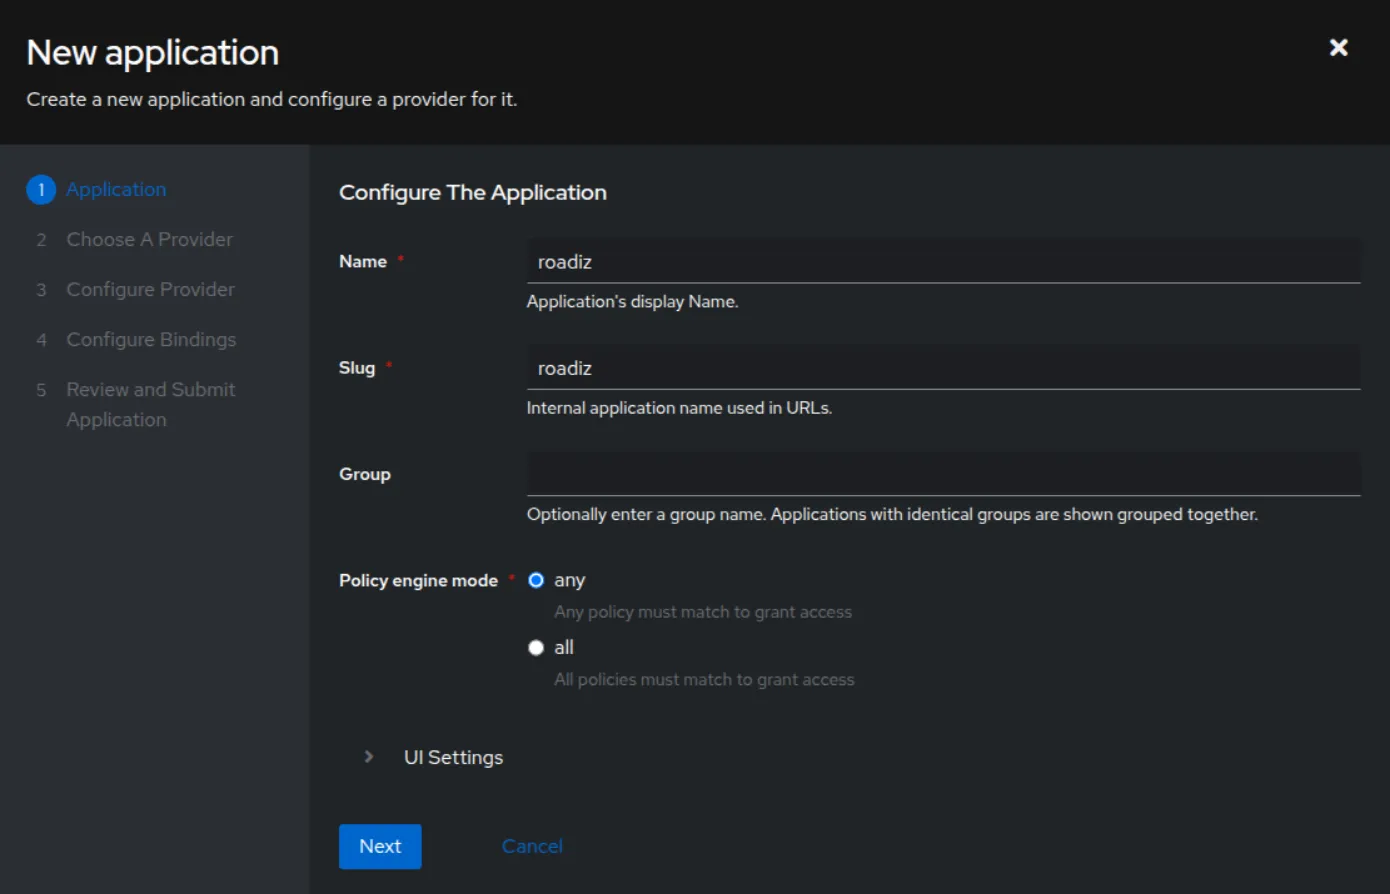
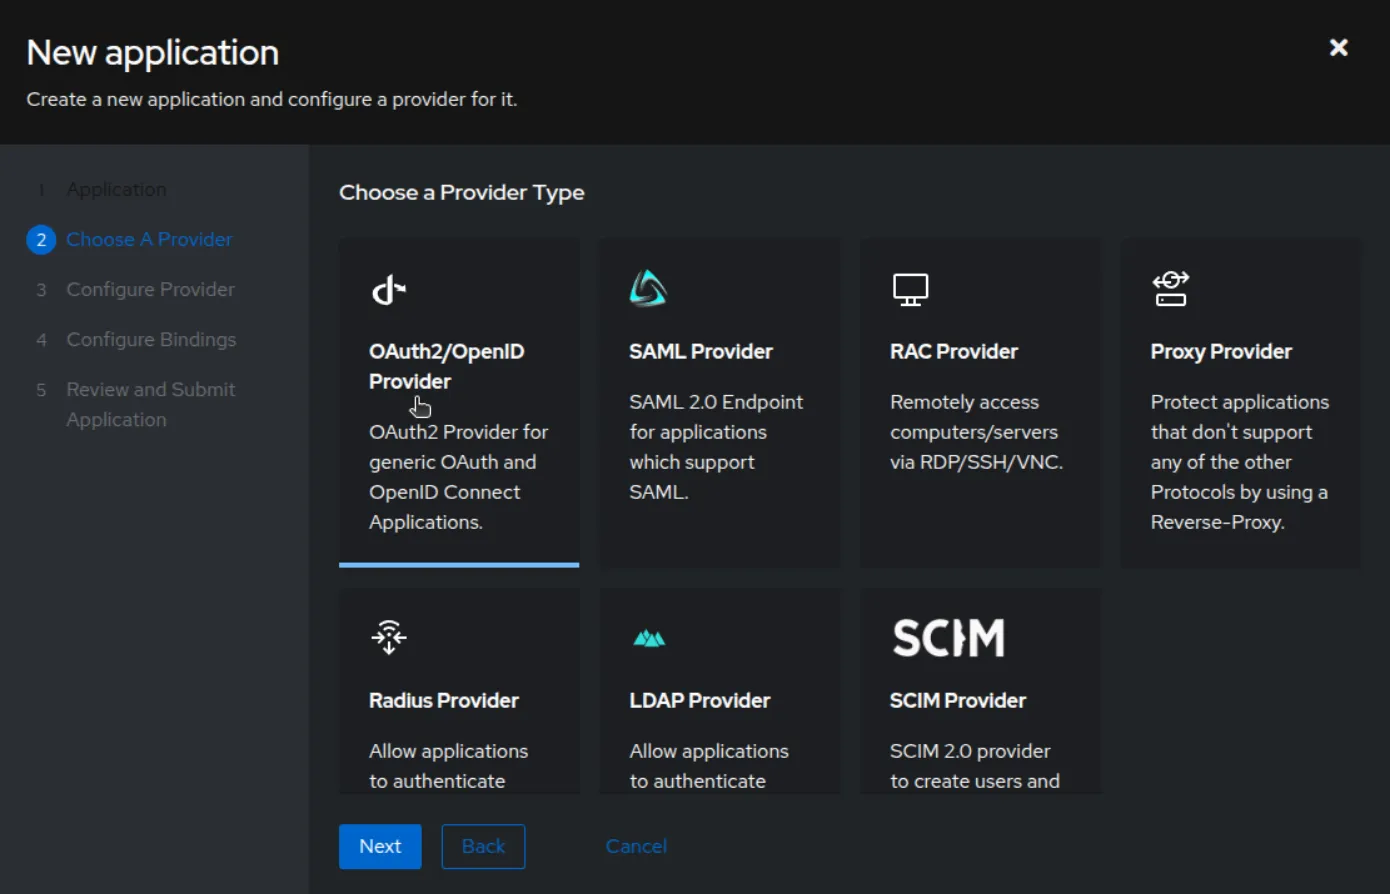
Creating an Application
Follow these steps to create an application in Authentik:
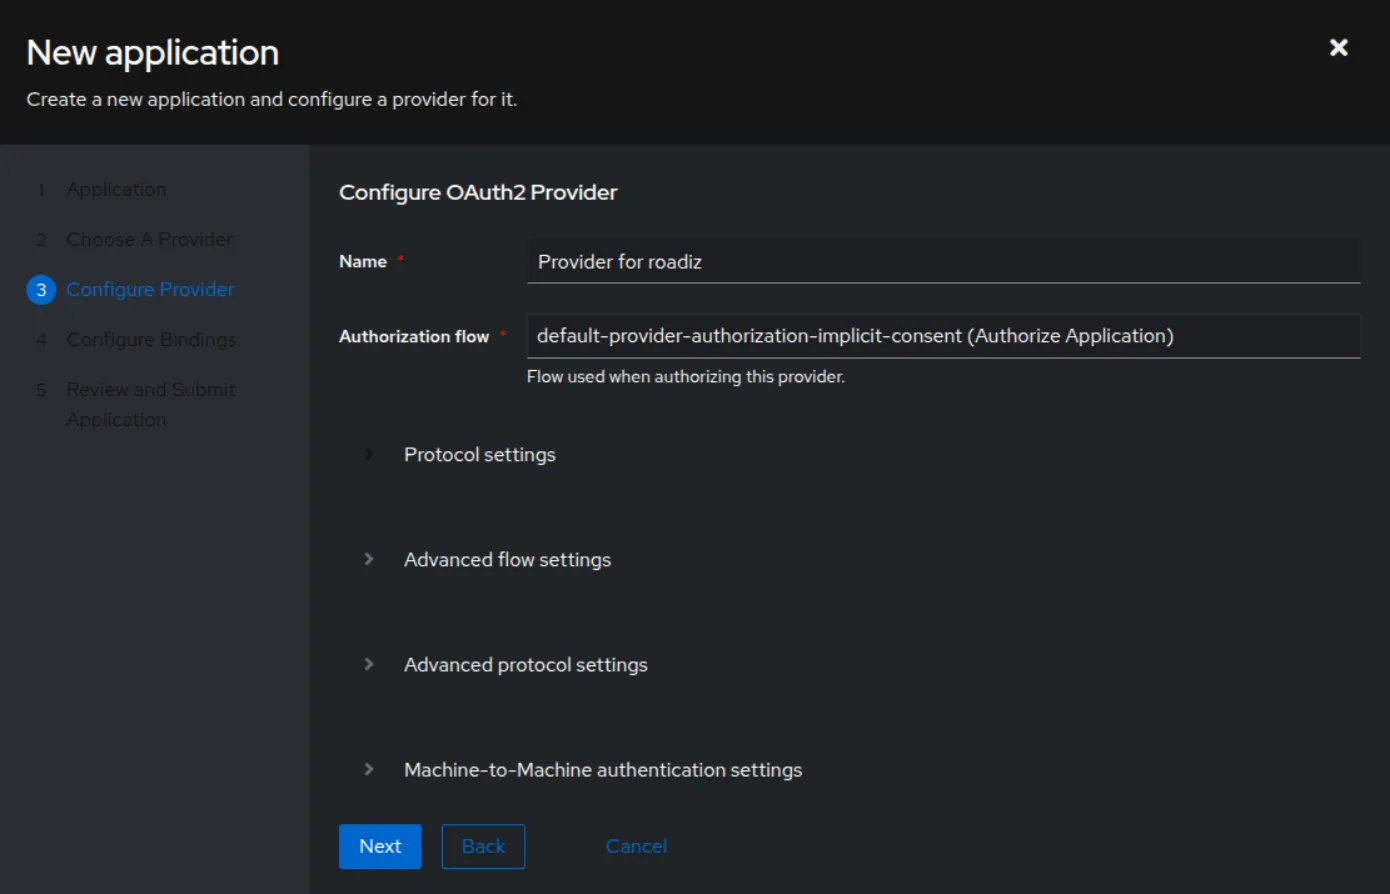
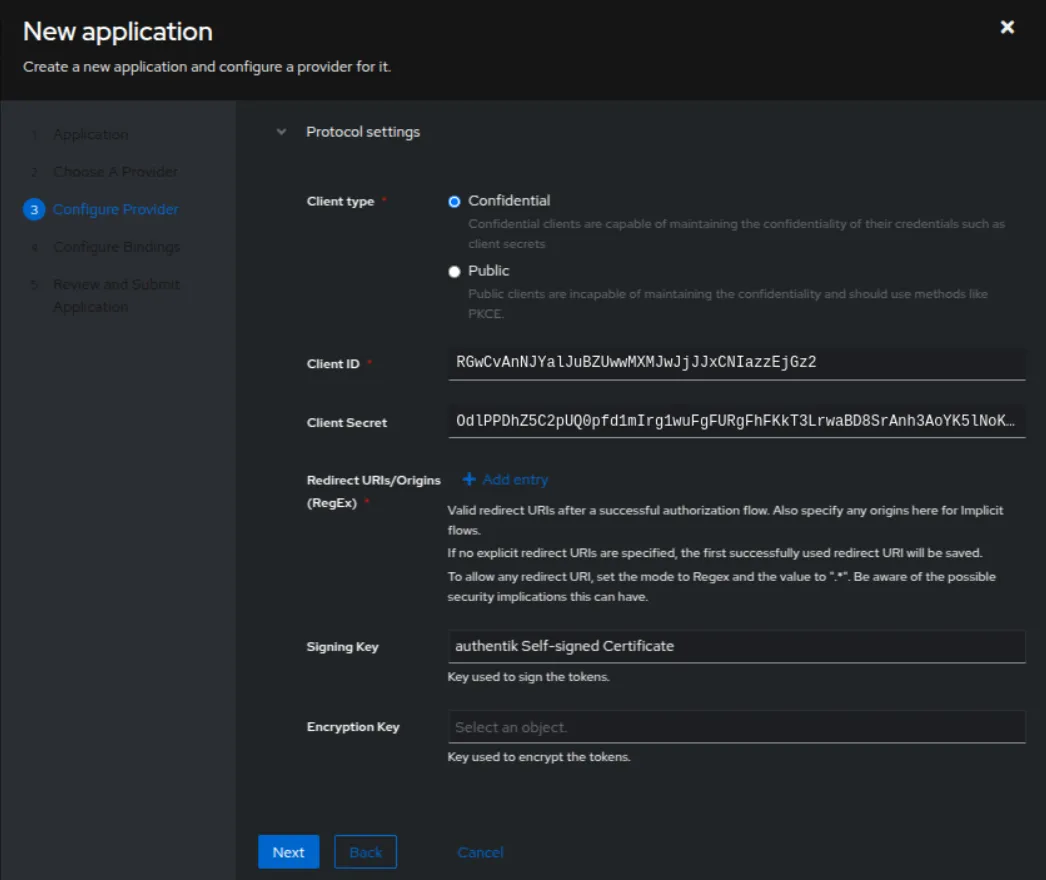
Configuring the Provider
Go to the provider you created:
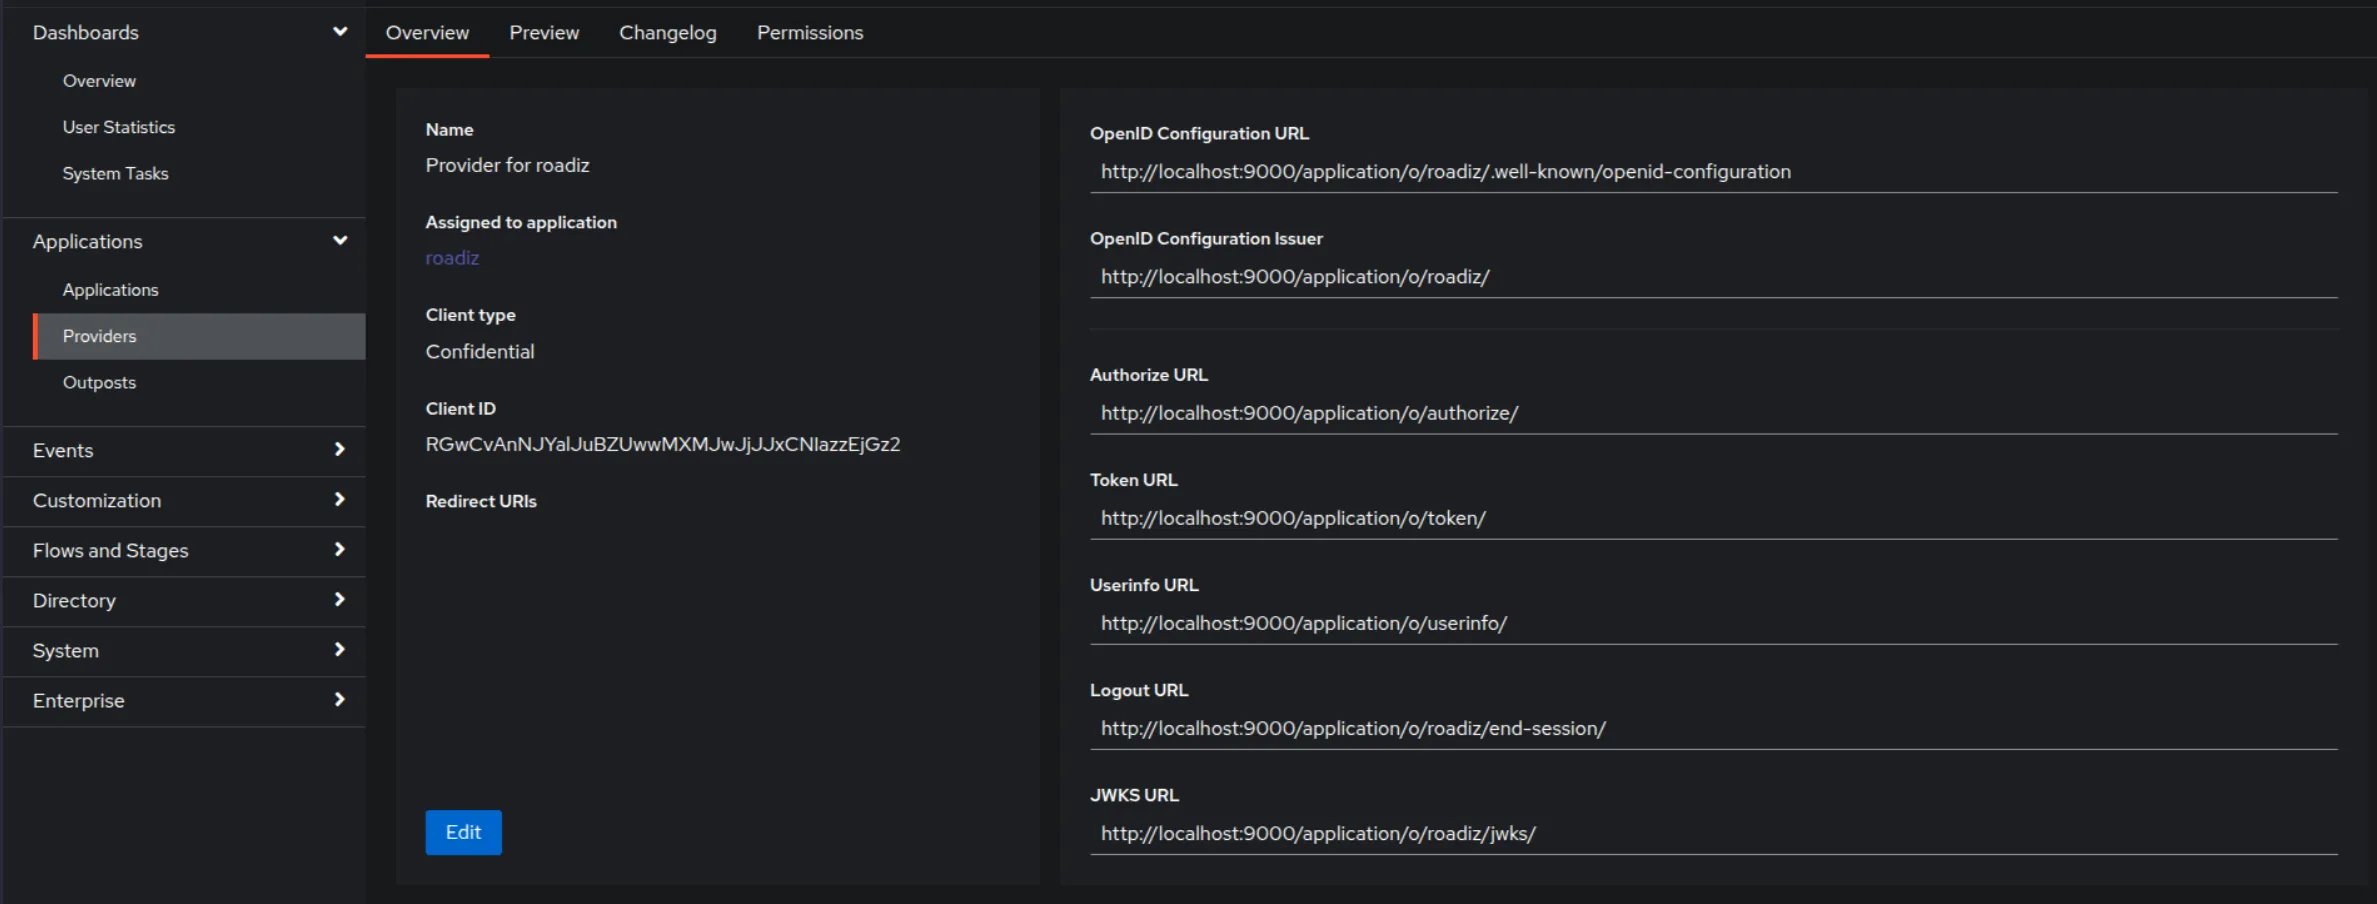
Add a URL in the redirect URL field (.../rz-admin/login).

Updating Environment Variables
Add the following variables to your .env file, using the data obtained from the provider in Authentik:
OPEN_ID_DISCOVERY_URL=<OpenID Configuration URL>OPEN_ID_CLIENT_ID=<Client ID>OPEN_ID_CLIENT_SECRET=<Client Secret>
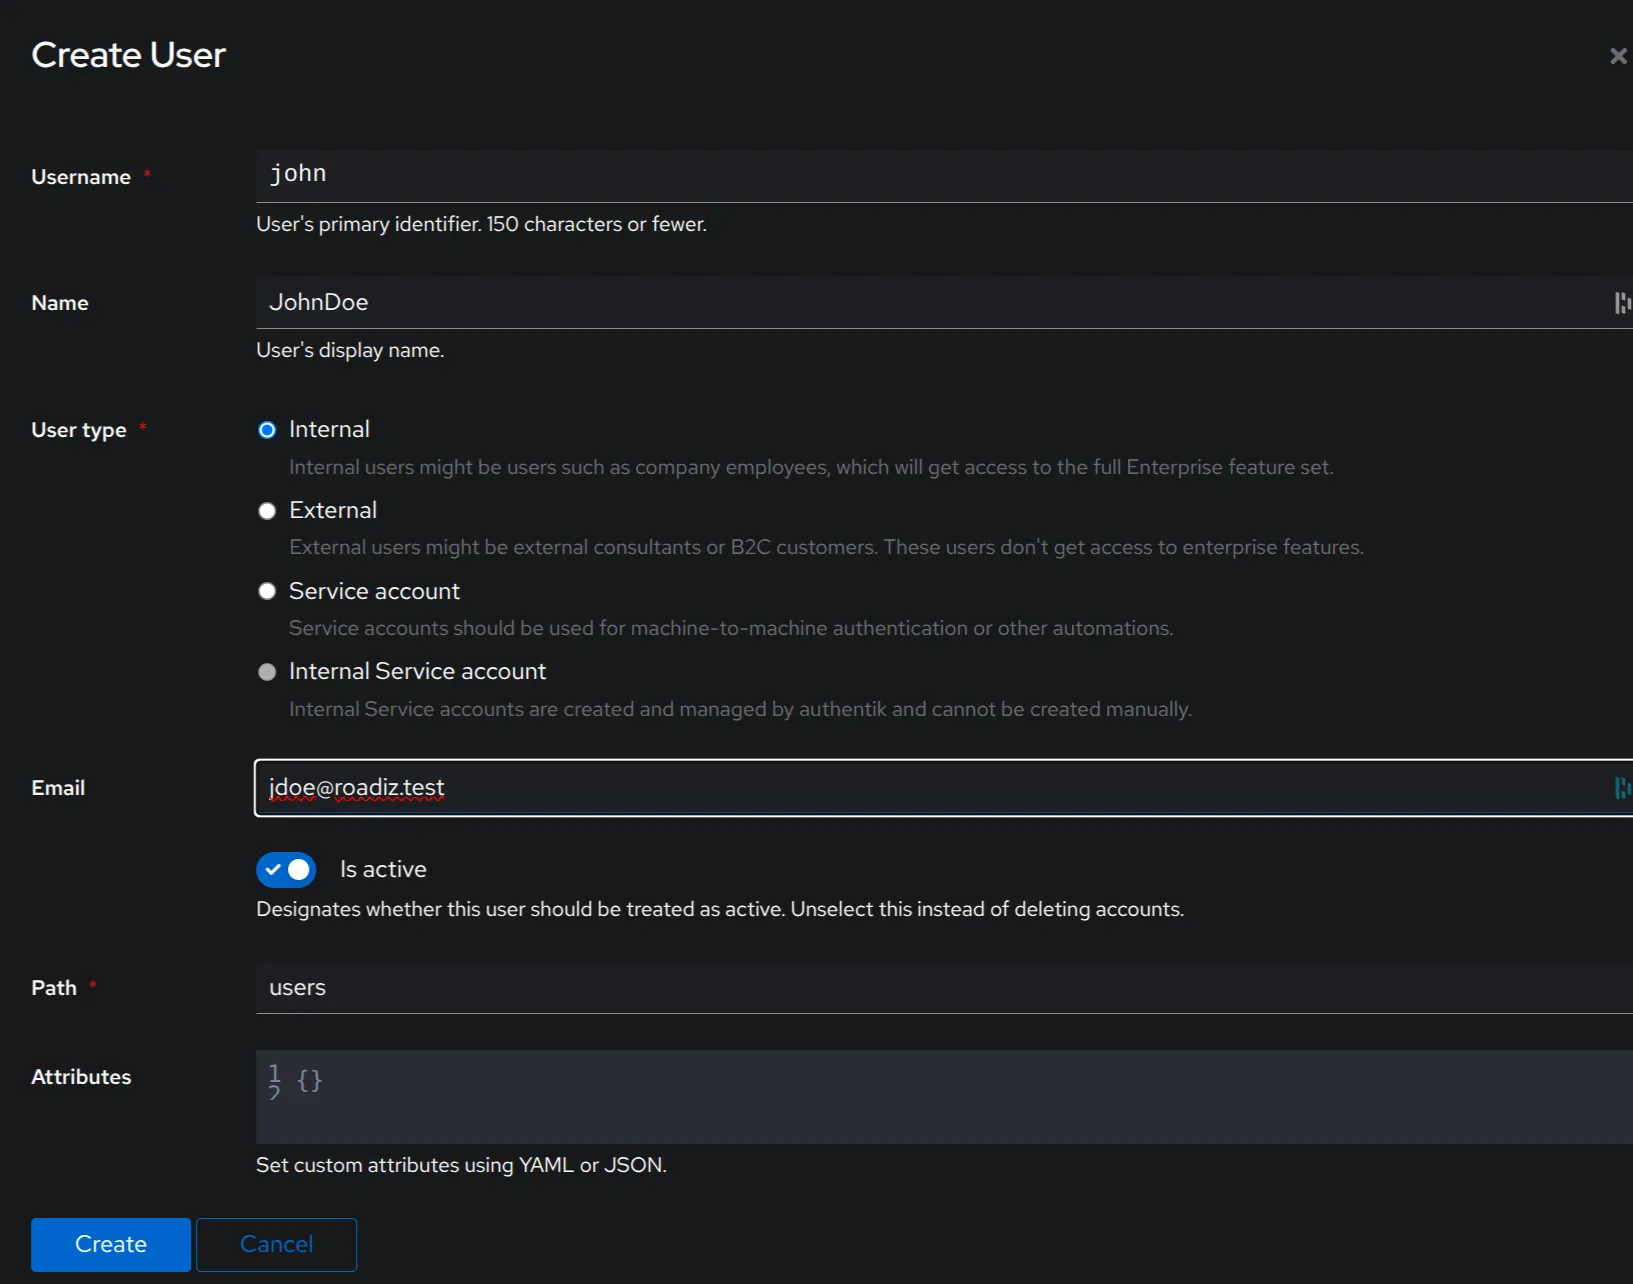
Creating a User in Authentik
From the Authentik admin panel, create a user with a scope similar to Roadiz:
Logging into Roadiz with OpenID
Now, when you go to the Roadiz login page:
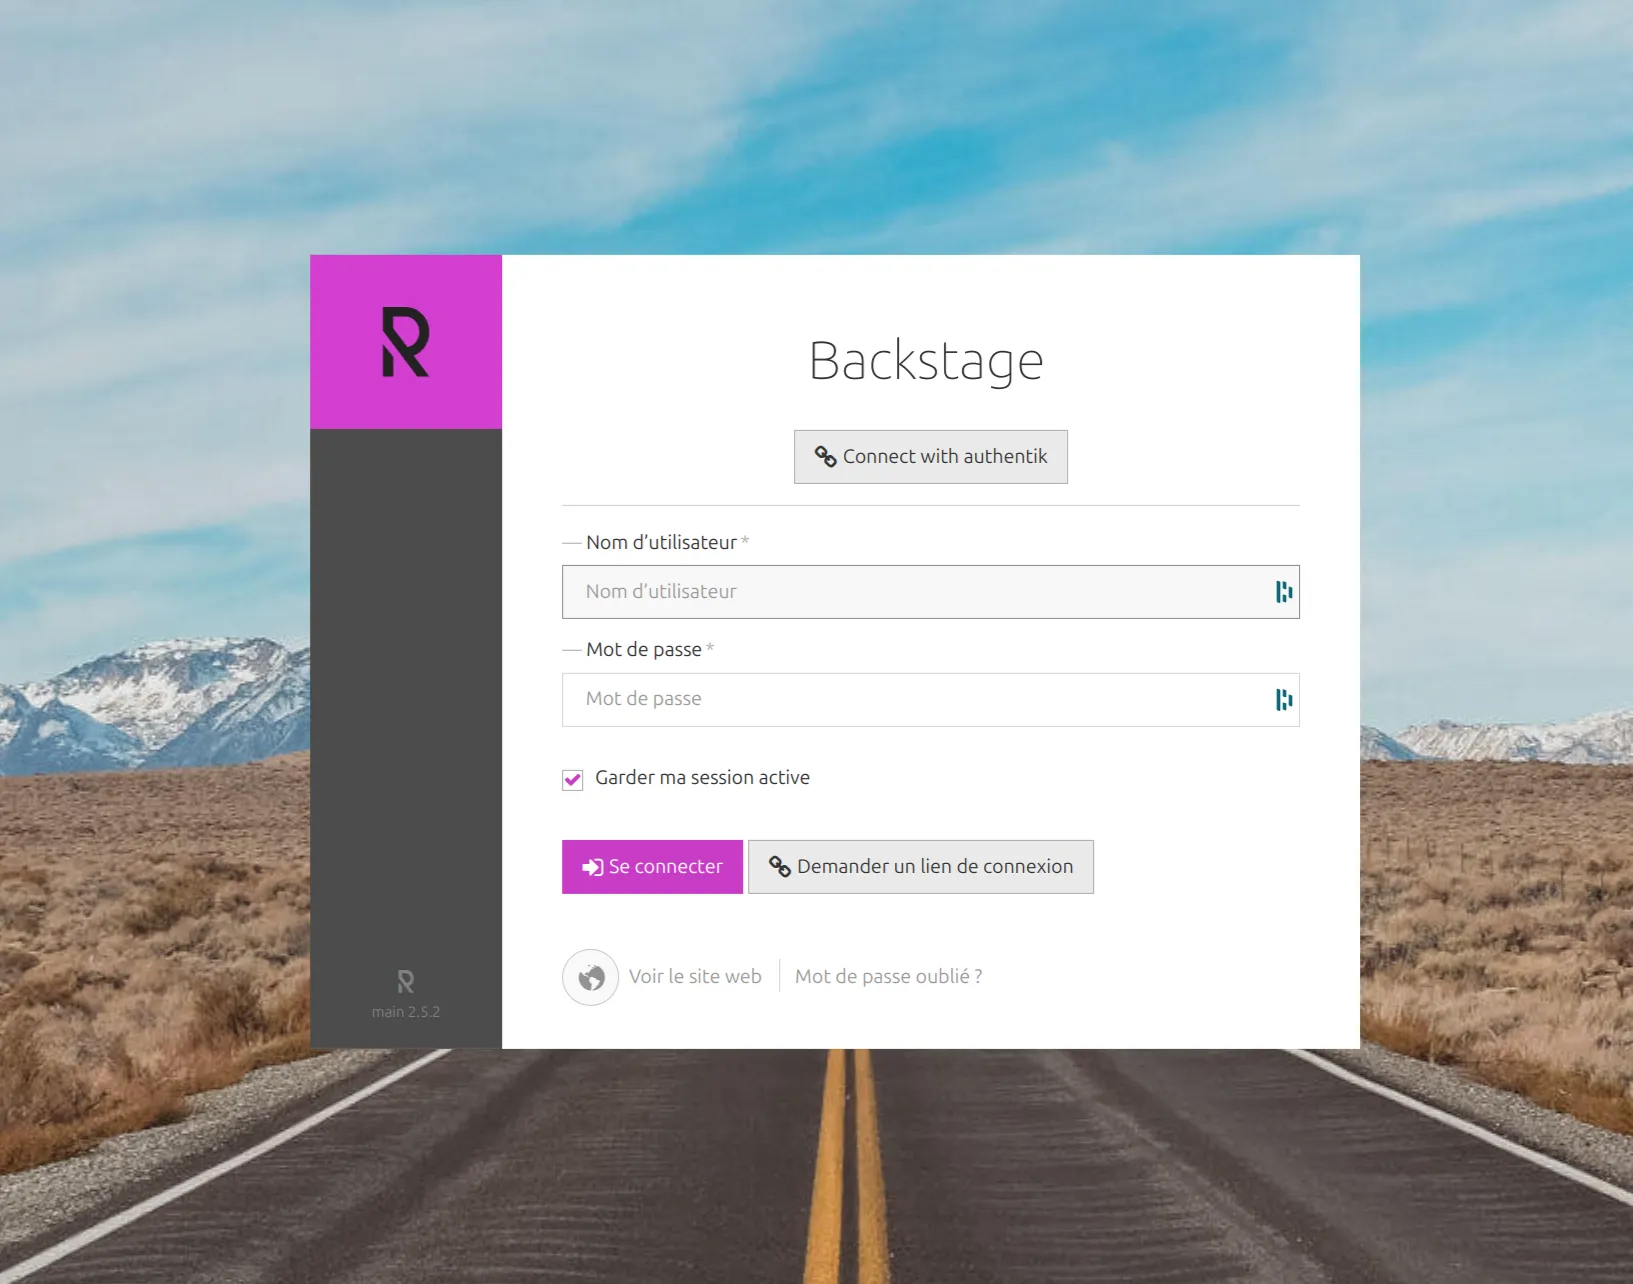
You can log in using OpenID. The login button has been updated to indicate connection via Authentik. Clicking it will redirect you to the Authentik login page, and after authentication, you will be automatically redirected to the Roadiz back office.
Translate Assistant
Roadiz can integrate with external translation services to automatically translate your markdown fields.
To enable it, add the following configuration to config/packages/roadiz_rozier.yaml:
roadiz_rozier:
    translate_assistant:
        # Here we use the good service in function of the key of your parameter
        deepl_api_key: '%env(string:DEEPL_API_KEY)%' # For DeepL Translate (https://developers.deepl.com/api-reference/translate)
INFO
- Replace DEEPL_API_KEY with your own API key stored in your environment variables.
- Currently, DeepL is supported, but other services may be added in the future.
- Once configured, Roadiz will automatically use the translation service when you request translations for your markdown fields.
See Translate Assistant extensions if you want to add another provider.
Bookmark links
Roadiz 2.7 adds a bookmark system for the back office sidebar. Configure a list of bookmarks with a label and URL; entries render in the order provided.
You can add custom bookmark links by adding the following configuration to config/packages/roadiz_rozier.yaml:
roadiz_rozier:
    bookmarks:
        -   label: "Project Documentation"
            url: "https://docs.roadiz.io"
        -   label: "GitHub Repository"
            url: "https://github.com/roadiz/roadiz"